

Homemade funnel cake is fried dough swirled into hot oil until golden and crispy, then dusted with powdered sugar for that classic carnival taste. I had one of these at a street fair in Brooklyn last month, and I couldn’t stop thinking about it for days, so I decided to figure out how to make it at home. After testing different batter ratios, oil temperatures, and pouring techniques over the past few weeks, I’ve nailed the exact crispy-outside, soft-inside texture that made me obsessed in the first place. The whole process takes 25 minutes from start to finish, and honestly, my homemade version is better than what I got at the fair because I can control the oil temperature and serve them immediately while they’re still crackling hot.
What Are the Ingredients for Funnel Cakes?
I use seven basic ingredients: all-purpose flour, baking powder, salt, sugar, eggs, milk, and vanilla extract. That’s it. No butter, no oil in the batter, no fancy additions. The simplicity is what makes funnel cake so easy to throw together when you’re craving that carnival taste, and it’s also why the technique matters so much since you can’t hide behind complex flavors.
The flour provides structure, and I always use all-purpose because it has the right protein content for a tender but stable fried dough. The baking powder gives you just a little lift without making the funnel cake too puffy. I add sugar for sweetness, but only 2 tablespoons because the powdered sugar topping adds most of the sweet flavor. When I tried 3-4 tablespoons of sugar in the batter, it was way too sweet and competed with the topping.
Eggs act as the binder and add richness, while the milk creates the liquid base that makes the batter pourable. I use whole milk specifically for the fat content, which makes a more tender funnel cake with better browning. The vanilla extract is technically optional, but I never skip it because that hint of vanilla flavor is what separates homemade funnel cake from basic carnival versions that taste like plain fried dough.
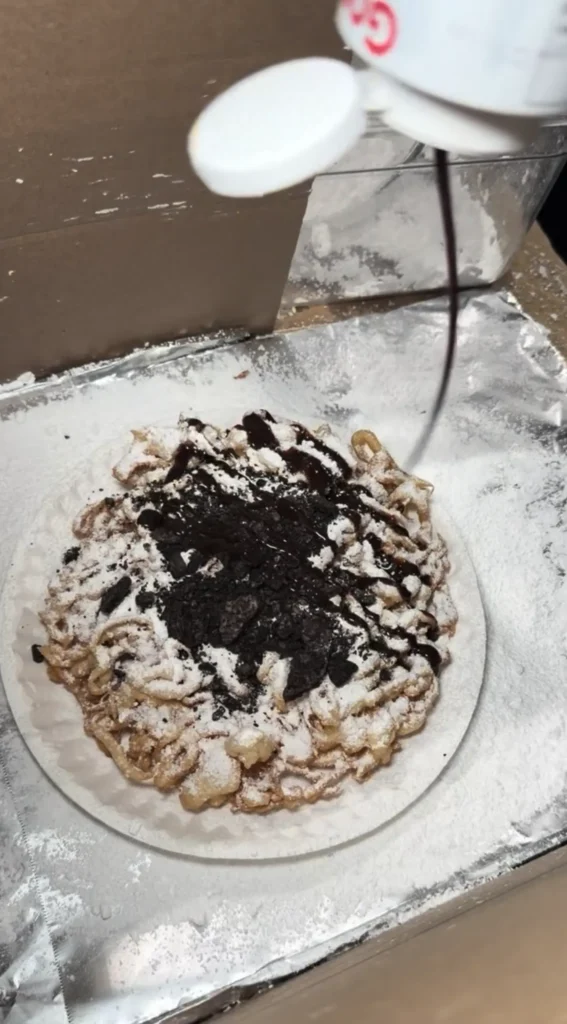
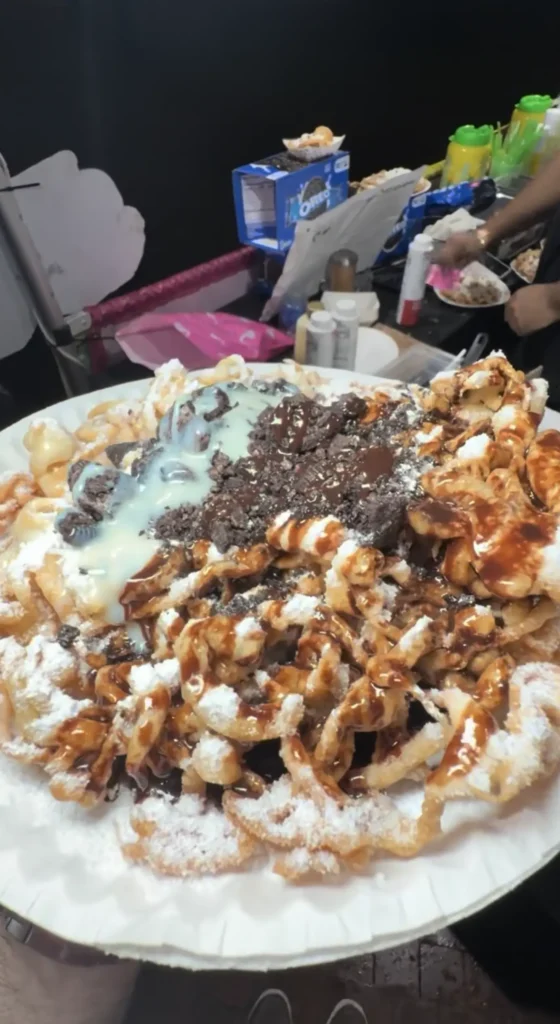
For frying, you just need a neutral oil with a high smoke point. I use vegetable or canola oil because they’re affordable, they don’t add any flavor, and they can handle the 375°F temperature without smoking. Then powdered sugar for topping is non-negotiable. Some people add cinnamon sugar, chocolate syrup, or fruit, but the classic version is just generous amounts of powdered sugar dusted on while the funnel cake is still hot so it sticks.
Is Funnel Cake Batter the Same as Pancake Batter?
No, funnel cake batter is much thinner than pancake batter, and that difference is critical to getting the right texture. I make pancakes all the time, and that batter is thick enough to hold its shape when you pour it onto a griddle and spread slightly but stay put. Funnel cake batter needs to flow easily through a funnel or squeeze bottle, so it’s closer to the consistency of heavy cream or thin crepe batter.
The ingredient ratios are different too. Pancake batter typically has more flour relative to liquid, plus it often includes melted butter or oil mixed directly into the batter. My funnel cake batter has no fat added to the mix because it’s going directly into hot oil, which provides all the fat it needs. The liquid-to-flour ratio is higher to get that pourable consistency that creates those thin, crispy strands.
I’ve accidentally used pancake batter consistency for funnel cakes before when I wasn’t paying attention, and it doesn’t work at all. The batter clogs in the funnel, comes out in thick globs instead of thin streams, and you end up with doughy, undercooked centers surrounded by dark exteriors. The thin consistency of proper funnel cake batter is what creates those crispy, lacy strands when it hits the hot oil and spreads slightly before setting.
The leavening is also lighter in funnel cake. I only use 1 teaspoon of baking powder for 2 cups of flour, whereas pancakes often use 1½-2 teaspoons to get that fluffy rise. Funnel cakes shouldn’t puff up too much because you want them crispy and relatively flat, not fluffy and cake-like. When I’ve tested with more baking powder, they puff up too much and lose that characteristic crispy texture.
Is Fried Dough the Same as Funnel Cake?
They’re similar but not identical. Fried dough is a broader category that includes funnel cakes, but also things like doughnuts, beignets, churros, zeppole, and elephant ears. Funnel cake is a specific type of fried dough with a distinctive lacy, web-like shape created by pouring thin batter through a funnel or squeeze bottle in overlapping patterns.
The main difference I notice is the texture and shape. Regular fried dough, like what you get at Italian festivals or fairs, is usually shaped into rounds or stretched flat before frying, and it has a thicker, chewier, more uniform texture throughout. Funnel cake has that signature crispy, irregular pattern with thin crispy parts and thicker soft sections all in one piece, which gives you textural variety in every single bite.
I’ve made both at home, and funnel cake batter is definitely thinner and more pourable than traditional fried dough, which is often made from a yeasted dough or thicker batter that you can handle with your hands and stretch or shape. You can’t shape funnel cake batter with your hands because it’s too liquid. That’s the whole point of using a funnel or squeeze bottle – the thin consistency creates those crispy strands when you pour it into the oil in motion.
The flavor profile is pretty similar since both are basically fried dough with powdered sugar, but the eating experience is completely different because of the texture contrast in funnel cake. You get super crispy bits that shatter when you bite them and softer, more tender sections in the same piece, whereas regular fried dough is more uniform and chewy throughout. I actually prefer funnel cake for that reason because the textural variety keeps every bite interesting.
What’s the Secret to Good Funnel Cake?
The secret is maintaining your oil temperature between 365-375°F consistently throughout the entire frying process. I’ve made hundreds of funnel cakes at this point, and temperature control is what separates crispy, golden perfection from greasy, undercooked disasters or burnt, raw-in-the-middle failures. When the oil is too cool, the batter absorbs oil instead of quickly forming a crispy exterior, and you end up with heavy, greasy funnel cakes. Too hot and the outside burns while the inside stays raw and doughy.
I use a candy thermometer or deep-fry thermometer clipped to the side of my pot, and I check it before frying each funnel cake. The temperature drops 10-20 degrees when you add the cold batter, which is completely normal, but you need to let it come back up to temperature between batches. This is why I only fry one funnel cake at a time even though it’s slower. When I’ve tried to rush the process and fry two at once, the temperature drops too much and both come out greasy and undercooked.
The second secret is the batter consistency. It needs to flow smoothly through your funnel or squeeze bottle but still hold together when it hits the oil without spreading out into a flat pancake. I aim for slightly thinner than pancake batter, about the consistency of heavy cream that coats the back of a spoon. If it’s too thick, you get dense, doughy funnel cakes that don’t cook through. Too thin and it spreads out too much in the oil, doesn’t hold its lacy shape, and comes out more like a crispy crepe.
The third thing I’ve learned through trial and error is you absolutely must serve these immediately, like within 5-10 minutes of frying. Funnel cakes lose their crispy texture fast as they cool and the steam inside makes them soggy. I’ve tried every reheating method, and nothing brings back that fresh-from-the-oil crispiness. Make them right before you plan to eat them, period. If I’m making these for a group, I fry them one at a time and people eat them as they come out of the oil.
Crispy Homemade Funnel Cake Recipe
Golden, crispy carnival-style funnel cake that rivals any state fair booth
Ingredients
Funnel Cake Batter
- 2 cups all-purpose flour (spooned and leveled)
- 1 teaspoon baking powder
- ½ teaspoon fine sea salt
- 2 tablespoons granulated sugar
- 2 large eggs (room temperature)
- 1½ cups whole milk (room temperature)
- 1 teaspoon pure vanilla extract
For Frying & Topping
- Vegetable or canola oil for frying (about 6-8 cups)
- Powdered sugar for dusting (generous amount)
- Optional toppings: chocolate syrup, strawberries, whipped cream, cinnamon sugar
I keep my oil between 365-375°F religiously. I’ve fried hundreds of these, and that 10-degree window is the difference between soggy funnel cake and the crispy, golden perfection you’re after. Too cool and you get greasy, undercooked dough. Too hot and the outside burns before the inside cooks through.
Step-by-Step Instructions
Step 1: Mix the Dry Ingredients
I start by whisking together 2 cups of all-purpose flour, 1 teaspoon of baking powder, ½ teaspoon of fine sea salt, and 2 tablespoons of sugar in a large bowl. I make sure to spoon my flour into the measuring cup and level it off with a knife, never scoop directly from the bag, because scooping packs the flour down and you’ll end up with too much flour, which makes the batter too thick.
The whisking is important here because it aerates the flour and ensures the baking powder and salt are evenly distributed throughout. I’ve had batches where I skipped this step and just stirred everything together, and I ended up with pockets of salty batter or areas where the baking powder concentrated and made weird puffy spots. I whisk for about 30 seconds until I don’t see any clumps of baking powder and the mixture looks uniform.
I use fine sea salt specifically because it dissolves more evenly than coarse kosher salt. Table salt works fine too and is what most people have. Kosher salt can work but you might need to use a bit more since it’s less dense by volume, maybe ¾ teaspoon instead of ½ teaspoon.
Step 2: Combine the Wet Ingredients
In a separate medium bowl, I beat 2 room-temperature eggs with a whisk until they’re completely broken up and slightly frothy, about 15-20 seconds of vigorous whisking. Then I add 1½ cups of whole milk (also at room temperature) and 1 teaspoon of vanilla extract, whisking until everything is completely combined and the mixture looks uniform with no streaks of egg yolk.
I use whole milk because the fat content makes a richer, more tender funnel cake with better browning. I’ve tried this with 2% milk and it works okay, but the texture isn’t quite as good and they don’t brown as nicely. Skim milk makes the funnel cake too lean and a bit tough, plus the browning is pale and anemic looking.
The vanilla is technically optional but I never skip it. That hint of vanilla flavor is what separates homemade funnel cake from the basic carnival versions that just taste like fried dough and sugar. I’ve used both pure vanilla extract and imitation vanilla, and honestly, in a fried application like this where the flavor is competing with hot oil and powdered sugar, I can barely tell the difference. Use whatever you have.
Step 3: Make the Batter
I pour my wet ingredients into the dry ingredients in three separate additions, whisking gently after each addition just until the flour disappears and I don’t see any more dry pockets. I don’t whisk vigorously, and I definitely don’t use an electric mixer which would overdevelop the gluten. Gentle whisking with a balloon whisk is all you need to bring the batter together.
After the final addition, I stop mixing when I still see a few tiny lumps, maybe the size of small peas or smaller. The batter should look smooth overall but not completely perfect and silky. This takes maybe 90 seconds total of actual whisking time. If I mix longer than that, I start developing too much gluten and the funnel cakes get tough and chewy instead of tender and crispy.
I let the batter rest for 5-10 minutes on the counter while I heat my oil. This resting time allows the flour to fully hydrate and any small lumps to dissolve on their own without any additional mixing. The batter will thicken very slightly during this rest, which is normal and actually good because it means the flour is absorbing the liquid properly.
If after resting the batter seems too thick to pour easily when you test it by lifting your whisk and watching how it drips off, I whisk in milk one tablespoon at a time. The batter should flow smoothly in a steady stream but hold together, kind of like thick heavy cream or thin honey.
Step 4: Heat the Oil
I pour vegetable or canola oil into a heavy-bottomed pot or Dutch oven until it’s about 2-3 inches deep. For my 5-quart Dutch oven, this is about 6 cups of oil, but it depends on the diameter of your pot. I clip a candy or deep-fry thermometer to the side of the pot, making sure the probe is submerged in the oil but not touching the bottom of the pot, which would give you a false reading.
I heat the oil over medium-high heat, which takes about 8-10 minutes to reach 365-375°F depending on how much oil you’re heating. I don’t rush this by cranking the heat to high because oil temperature is much harder to control when you heat it too fast, and you risk overshooting your target temperature. I want steady, gradual heating that I can monitor.
While the oil heats, I prepare my pouring tool. I use a plastic squeeze bottle with about a ½-inch opening, which I’ve found gives me the most control over batter flow and pattern creation. You can also use a funnel, which is the traditional tool, a piping bag with a large round tip, or even a zip-top bag with the corner cut off about ½-inch wide. I pour the batter into my chosen tool and set it aside.
I test the oil temperature by dropping in a tiny bit of batter from a spoon. If it sizzles immediately and rises to the surface within a second, the oil is ready. If it sinks and takes 3-4 seconds to rise, I wait a bit longer and test again.
Step 5: Fry the Funnel Cakes
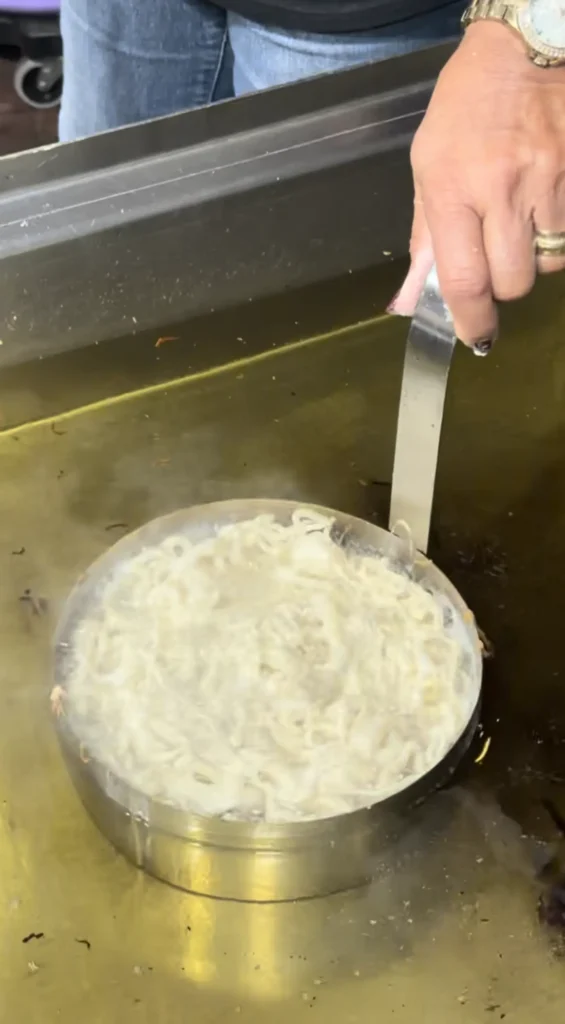
I hold my squeeze bottle about 3-4 inches above the surface of the oil and squeeze a steady stream of batter while moving my hand in a circular, zigzag pattern. I work relatively quickly, creating overlapping loops and crosses to build a lacy, interconnected web of dough about 6-7 inches across. The whole pouring process takes maybe 5-6 seconds per funnel cake, and I don’t overthink the pattern since the randomness is part of the charm.
I let the funnel cake fry undisturbed for 60-90 seconds on the first side. I’m watching for the edges to turn deep golden brown and the bottom to set enough that when I gently lift a corner with my tongs, it holds together without falling apart. If I flip too early, the batter is still too liquid and it falls apart or splashes. Too late and the first side gets too dark and bitter.
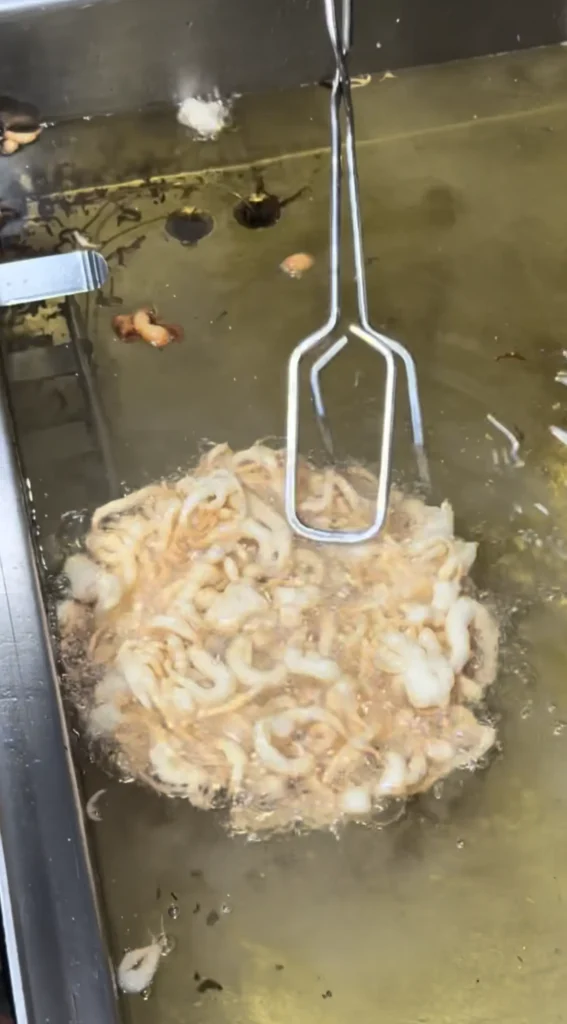
I use long tongs or a spider skimmer to flip the funnel cake in one smooth, confident motion. The second side cooks faster than the first, usually just 45-60 seconds because the oil is slightly hotter and the dough is already partially cooked through. I’m looking for an even golden brown color across the entire funnel cake, with some darker spots on the thinnest strands, which is totally normal and actually adds to the texture contrast.
When both sides are golden brown and the funnel cake looks crispy around the edges, I lift it out of the oil with my spider skimmer or tongs, letting excess oil drip back into the pot for a few seconds. Then I transfer it to a wire rack set over a baking sheet or to a plate lined with a double layer of paper towels.
I only fry one funnel cake at a time, even though it’s tempting to speed things up by doing multiple batches. Overcrowding drops the oil temperature too much and makes it impossible to flip them properly without them sticking together or breaking apart. I’ve tried rushing this process and ended up with greasy, undercooked funnel cakes every single time. Be patient and fry them one at a time for perfect results every time.
Step 6: Drain and Serve
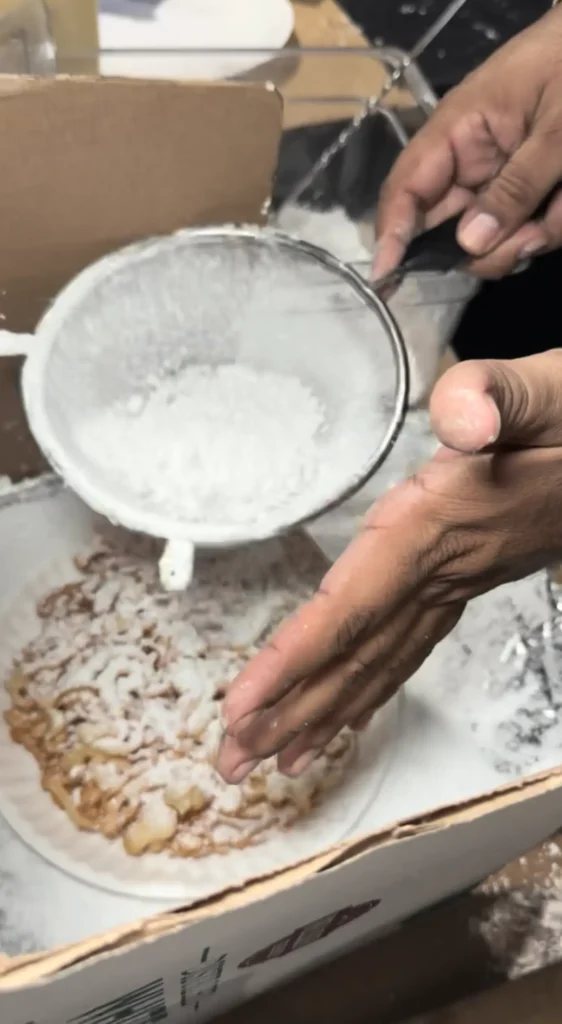
I let each funnel cake drain on the wire rack for about 30 seconds to let the excess oil drip off completely. Then I immediately dust it generously with powdered sugar while it’s still hot so the sugar sticks to the surface. I use a fine-mesh sieve to get an even coating, shaking it over the funnel cake from about 6 inches above to get good coverage.
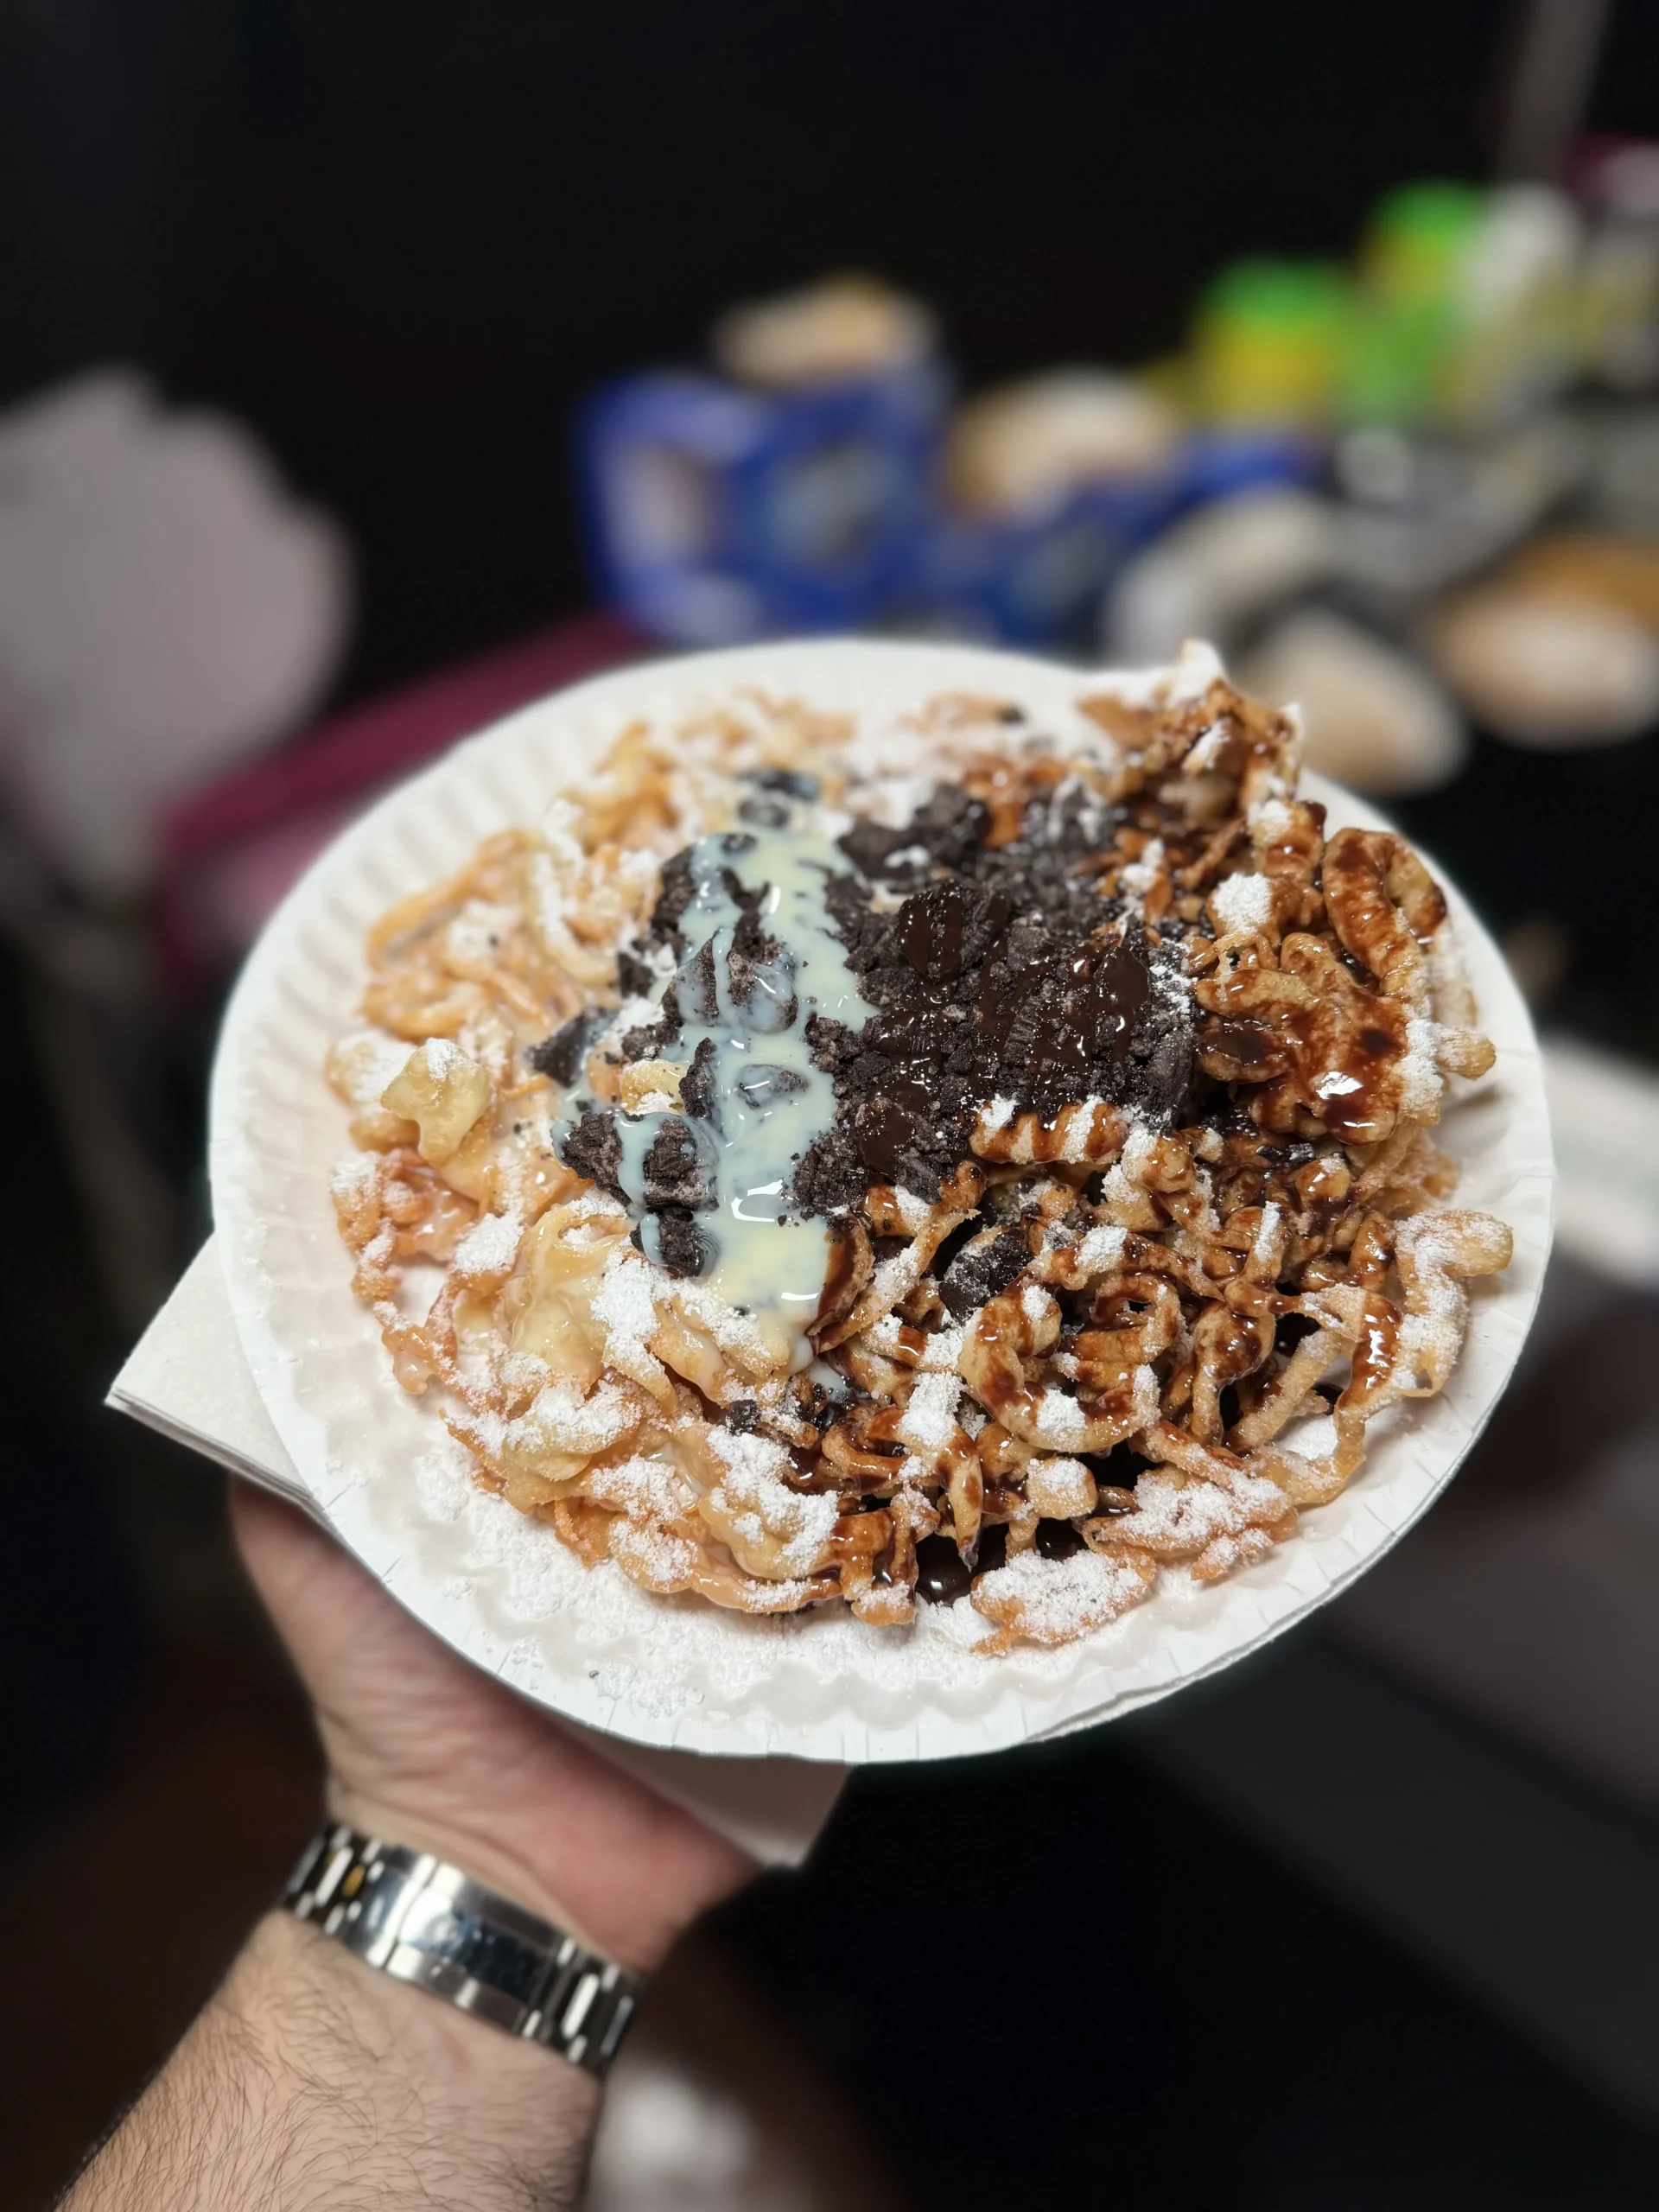
I serve these immediately while they’re still warm and crispy, ideally within 5 minutes of frying. Funnel cakes are absolutely best eaten right away. The longer they sit, even just 10-15 minutes, the more they soften and lose that incredible crispy texture as the steam inside condenses. I’ve tried reheating them in the oven or air fryer, and while it’s possible, they never quite recover that fresh-from-the-fryer crispiness.
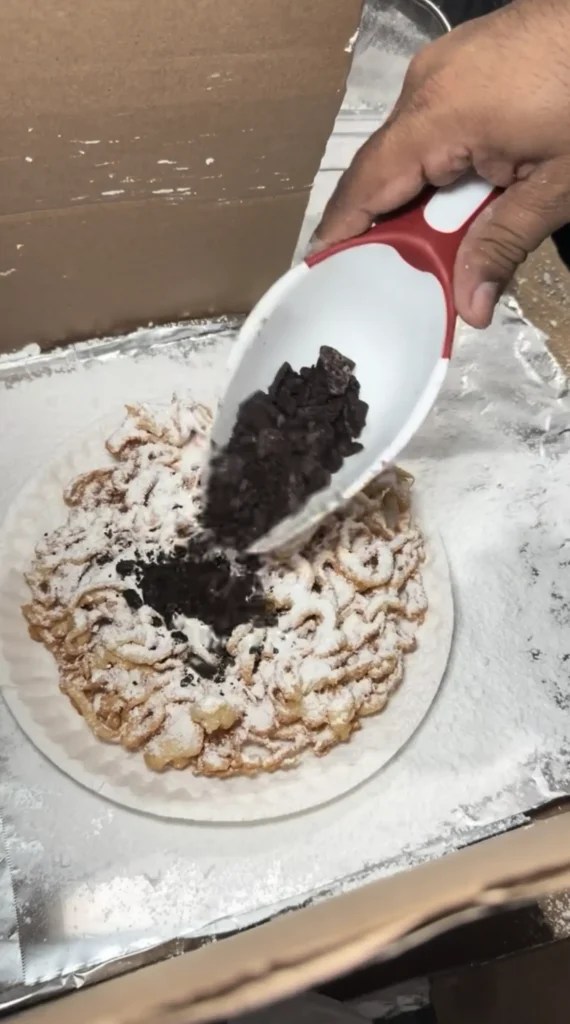
For toppings, I keep it simple with powdered sugar most of the time because that’s the classic carnival version and it’s perfect on its own. But I’ll add chocolate syrup, sliced strawberries, whipped cream, or cinnamon sugar for a more decadent version when I’m in the mood. I drizzle or add toppings right before serving, never beforehand, because wet toppings like chocolate syrup can make the funnel cake soggy if they sit too long.
Crispy Homemade Funnel Cake Recipe
Ingredients
Method
- I whisk together the flour, baking powder, salt, and sugar in a large bowl until well combined and aerated, about 30 seconds. In a separate bowl, I beat the eggs until frothy, then whisk in the milk and vanilla until smooth with no streaks.
- I pour the wet ingredients into the dry ingredients in three additions, whisking gently after each addition just until the flour disappears. I stop when a few small lumps remain and let the batter rest for 5-10 minutes while I heat the oil. The batter should be slightly thinner than pancake batter.
- I heat 2-3 inches of vegetable oil in a heavy pot to 365-375°F, checking with a candy thermometer clipped to the side. While the oil heats, I pour the batter into a squeeze bottle or funnel with a ½-inch opening.
- I hold the squeeze bottle 3-4 inches above the oil and squeeze a steady stream of batter in overlapping circles and zigzags to create a lacy pattern about 6-7 inches across. I fry for 60-90 seconds on the first side until the edges are golden brown, then flip carefully and cook for 45-60 seconds on the second side.
- I transfer each funnel cake to a wire rack to drain for 30 seconds, then immed
Notes
Frequently Asked Questions
Can I Make Funnel Cake Batter Ahead of Time?
Yes, I make the batter up to 24 hours in advance and store it in an airtight container in the refrigerator. The key is bringing it back to room temperature before frying, which takes about 30-45 minutes on the counter. Cold batter straight from the fridge doesn’t fry evenly and creates temperature issues in the oil that lead to greasy, undercooked funnel cakes.
I’ve actually found that batter made the day before works slightly better than fresh batter because the flour has more time to fully hydrate and the gluten relaxes. The funnel cakes come out with a more tender interior and better texture overall when I use overnight batter. Just give it a gentle whisk before pouring since it will separate slightly in the fridge with the liquid settling on top.
Never leave batter at room temperature for more than 2 hours though. The eggs and milk make it a food safety risk for bacterial growth. If I’m making these for a party or event, I mix the batter in the morning, refrigerate it immediately, then pull it out about an hour before I plan to start frying so it has time to come to room temperature.
What’s the Best Tool for Pouring the Batter?
I use a plastic squeeze bottle with a ½-inch opening, which gives me the most control over the batter flow, pattern creation, and when to start and stop pouring. I bought a 3-pack of these at a restaurant supply store for like $8, and they’re perfect because I can control the pressure and speed with how hard I squeeze, and I can stop the flow instantly by releasing pressure.
A funnel works great too, and that’s the traditional tool that gives funnel cake its name, but I find it harder to create intricate patterns because gravity controls the flow instead of me. If you use a funnel, I recommend one with at least a ½-inch opening at the bottom, maybe even closer to ¾-inch. Anything smaller and the batter doesn’t flow smoothly enough, especially if your batter is on the thicker side.
In a pinch, I’ve used a gallon zip-top bag with a ½-inch corner cut off. This works surprisingly well and is what I recommend if you don’t want to buy special equipment, though it’s a bit messier and you can’t turn off the flow as easily as with a squeeze bottle. A piping bag with a large round tip (like a #12 or larger) is another good option if you already have one for cake decorating.
Why Did My Funnel Cake Turn Out Greasy?
Your oil temperature was too low. I’ve made this mistake dozens of times early on when I was figuring out this recipe. When oil is below 360°F, the batter absorbs oil for the first 10-15 seconds instead of quickly forming a crispy exterior that seals in the dough. The result is a heavy, greasy funnel cake that leaves oil on your fingers and paper towels and just tastes oily instead of crispy.
The other possibility is you’re not draining them properly after frying. I transfer each funnel cake to a wire rack placed over a baking sheet, not just paper towels on a plate. Paper towels can trap steam underneath, which makes the bottom soggy and greasy because the condensation mixes with residual oil. A wire rack lets air circulate all around the funnel cake and excess oil drip away completely without creating steam.
I also make sure not to overcrowd my pot by trying to fry multiple funnel cakes at once. When I try to fry two funnel cakes at the same time, the temperature drops 30-40 degrees instead of just 10-20 degrees, and both end up absorbing oil and coming out greasy. One at a time keeps the oil temperature stable and prevents oil absorption. It’s slower but absolutely worth it for crispy, non-greasy results.
Can I Use a Different Type of Milk?
Yes, but whole milk gives you the best texture and browning. I’ve tested this recipe with 2% milk, 1% milk, skim milk, and even buttermilk to see what works. The 2% works fine and you probably won’t notice a huge difference, especially if you’re adding toppings like chocolate syrup. Skim milk makes the funnel cake a bit tougher and less rich, plus the browning is paler and less appealing.
Buttermilk is interesting because it adds a subtle tang and makes the funnel cake extra tender, but you need to add ½ teaspoon of baking soda to the dry ingredients to neutralize the acid, otherwise the tang is too strong. I’ve done buttermilk versions and they’re delicious, just slightly different from traditional funnel cake with more of a tangy flavor profile.
For dairy-free versions, I’ve had good results with full-fat oat milk and canned coconut milk (the thick kind from a can, not the beverage in a carton). Almond milk is too thin and doesn’t create the right texture or richness. If you’re using a non-dairy milk, pick one with some fat content for the best results, at least 3-4 grams of fat per cup.
How Do I Store and Reheat Leftover Funnel Cake?
Honestly, funnel cakes are meant to be eaten fresh right out of the fryer, and they lose about 80% of their appeal within an hour of frying as they cool and the steam inside makes them soggy. But if you absolutely need to store them, I place them in a single layer in an airtight container with paper towels between each layer to absorb moisture. They’ll keep at room temperature for about 24 hours.
For reheating, I’ve found the best method is a 375°F oven for 5-7 minutes, which crisps them back up better than the microwave. The oven heat evaporates some of the internal moisture and re-crisps the exterior. An air fryer at 350°F for 3-4 minutes also works great if you have one and gives you maybe the best reheating results. I’ve tried microwaving them and I absolutely do not recommend it because it makes them soggy, chewy, and rubbery.
The texture will never be quite as good as fresh, but the oven or air fryer method gets you maybe 70% of the way there if you eat them right after reheating. I skip the powdered sugar before storing and add it fresh after reheating. Sugar that sits on fried dough overnight gets wet and gummy from the steam and humidity, which makes the whole thing less appealing and creates a weird sticky coating.
Explore More from Foody Fetish
Recipes, restaurant reviews, and city food guides to fuel your food obsession
Popular Recipes
I’ve tested these recipes dozens of times to get them perfect. These are the ones I make on repeat.
- Crispy Air Fryer Chicken Wings
- Homemade Churros Recipe
- Perfect Smoked Brisket
- Authentic Carbonara Pasta
City Food Guides
I’ve eaten my way through these cities to bring you the best spots, hidden gems, and must-try dishes.
Explore CitiesRestaurant Reviews
Honest reviews of restaurants I’ve actually visited. I tell you what to order and what to skip.
- Joe’s Pizza – Brooklyn, NY
- Franklin Barbecue – Austin, TX
- Momofuku Noodle Bar – NYC
- Gjelina – Venice, CA