

Blooming onion is the appetizer that makes the entire table stop talking when it arrives. One whole sweet onion, cut into petals, double-coated in seasoned flour and egg wash, then deep-fried at 375°F until the outside shatters like a chip and the inside is soft, sweet, and steaming. This recipe covers the cutting technique that keeps the petals attached, the double-coat batter method that builds a thick crunchy shell, and the spicy horseradish dipping sauce that ties everything together. Total time is under 30 minutes.
Jump to Recipe
What Makes a Great Blooming Onion
The Cut Is the Entire Trick
A blooming onion looks impressive, but the technique behind it is straightforward once you understand the geometry. You cut downward from the top of the onion toward the root, making 12 to 16 evenly spaced slices. The root holds everything together while the petals fan out during frying. If you cut through the root, the onion falls apart into individual rings. If your cuts are too shallow, the petals will not separate enough to bloom. Therefore, the goal is deep, confident cuts that stop about half an inch from the root base.
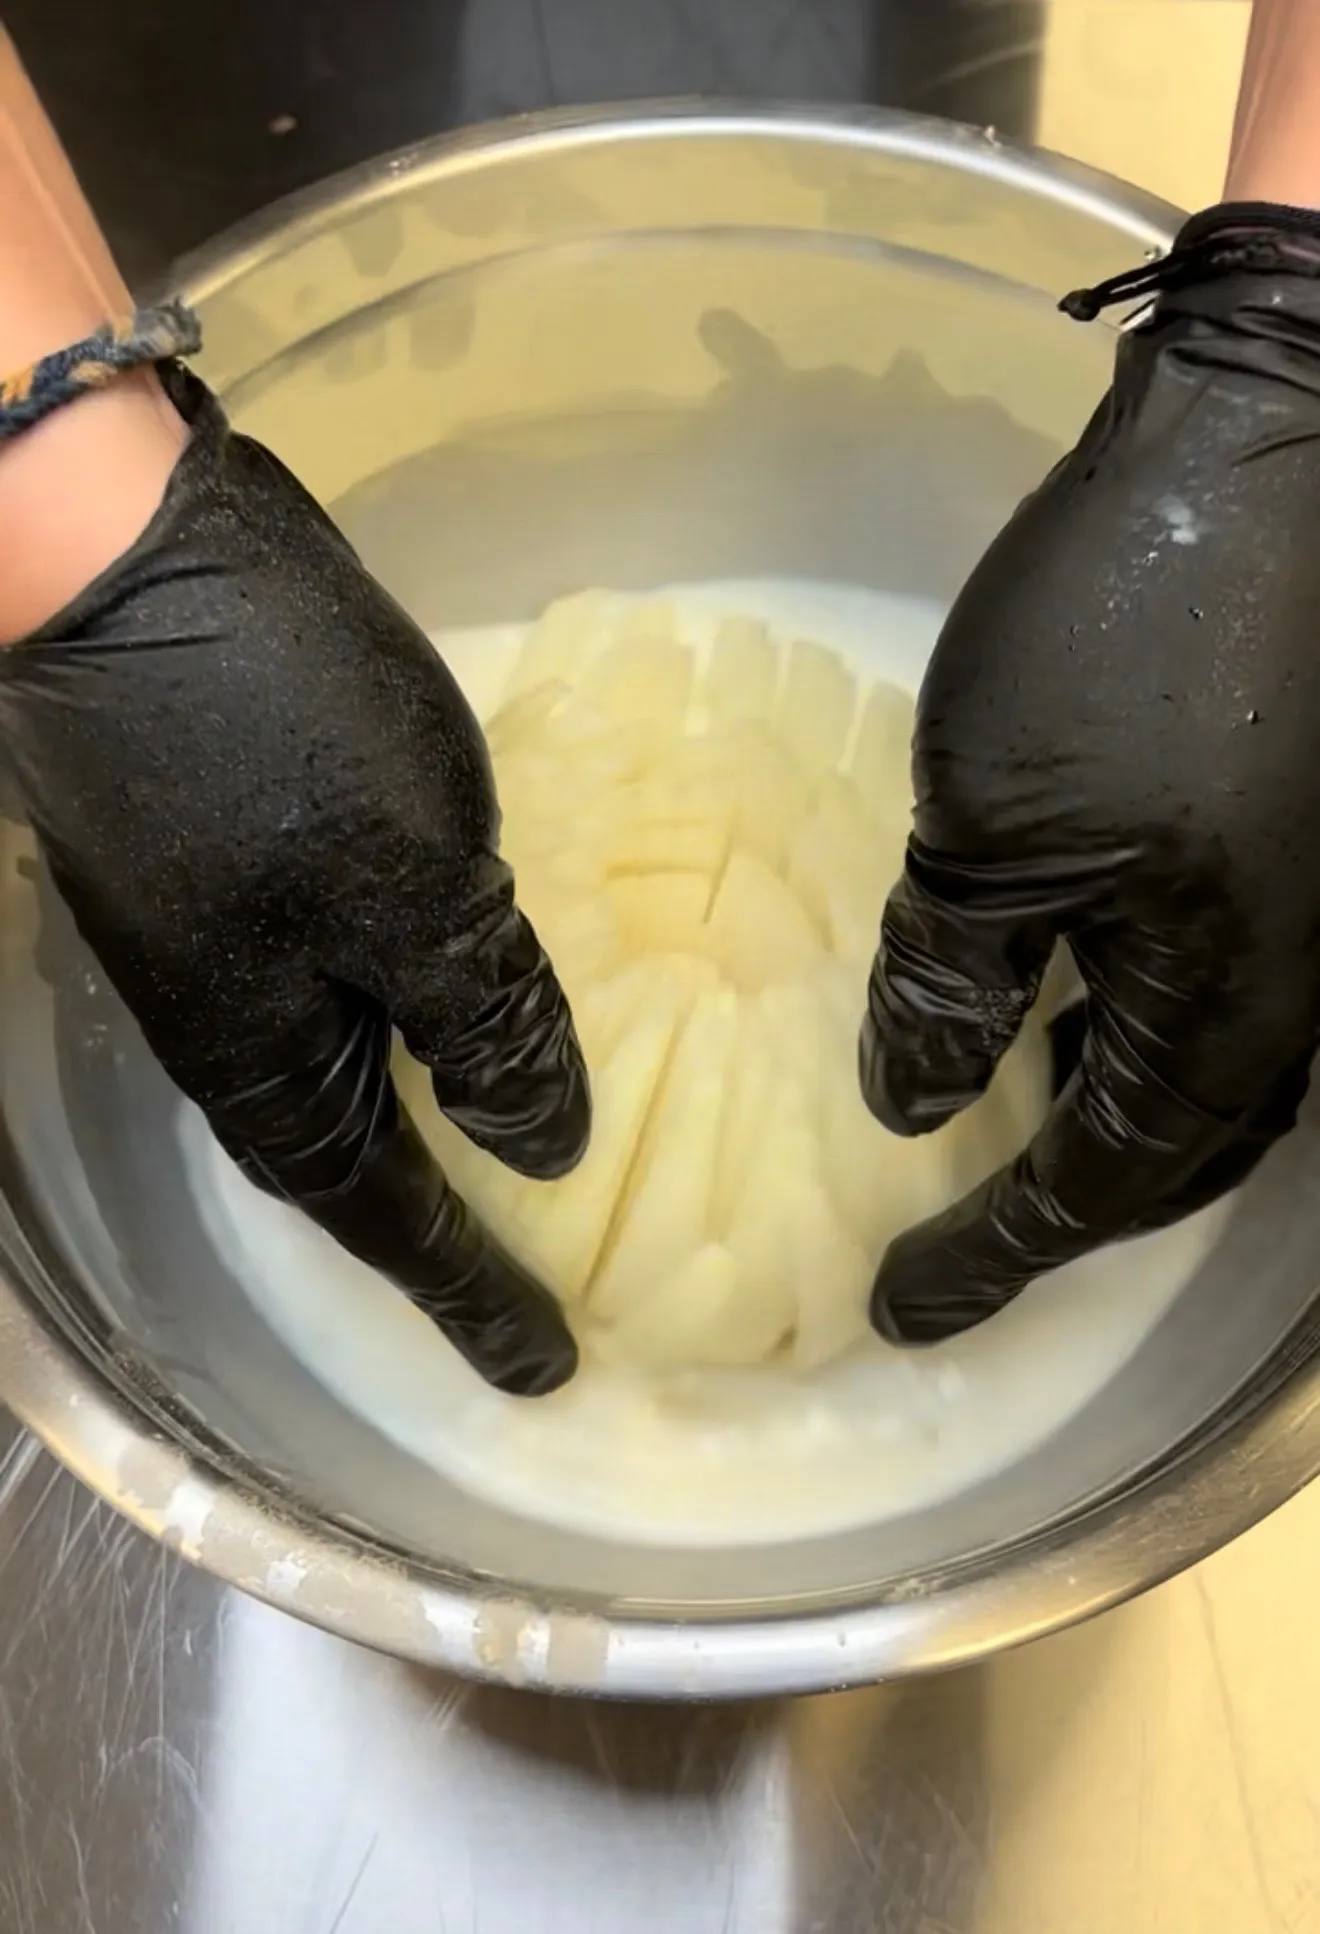
Start with 4 cuts to quarter the onion, then cut each quarter into 3 or 4 additional sections. After cutting, flip the onion over and gently press down on the root end to fan the petals outward. If the petals resist separating, soak the cut onion in ice water for 10 minutes. The cold water causes the layers to contract slightly and pull apart, making them easier to coat with batter and giving the finished product a wider, more dramatic bloom.
Why Vidalia or Sweet Onions Work Best
Sweet onions like Vidalia, Walla Walla, or Maui have lower sulfur content and higher sugar compared to yellow or white onions. When fried, that sugar caramelizes inside the batter shell, producing tender, sweet petals that contrast with the crispy, seasoned coating. Regular yellow onions work in a pinch but taste sharper and more pungent after frying. Additionally, sweet onions tend to have thicker layers between rings, which creates meatier petals with more substance in each bite. Choose the largest onion you can find. Bigger onions produce more dramatic blooms and more surface area for the batter to cling to.
The Double-Coat Batter Method
Why One Coat Is Not Enough
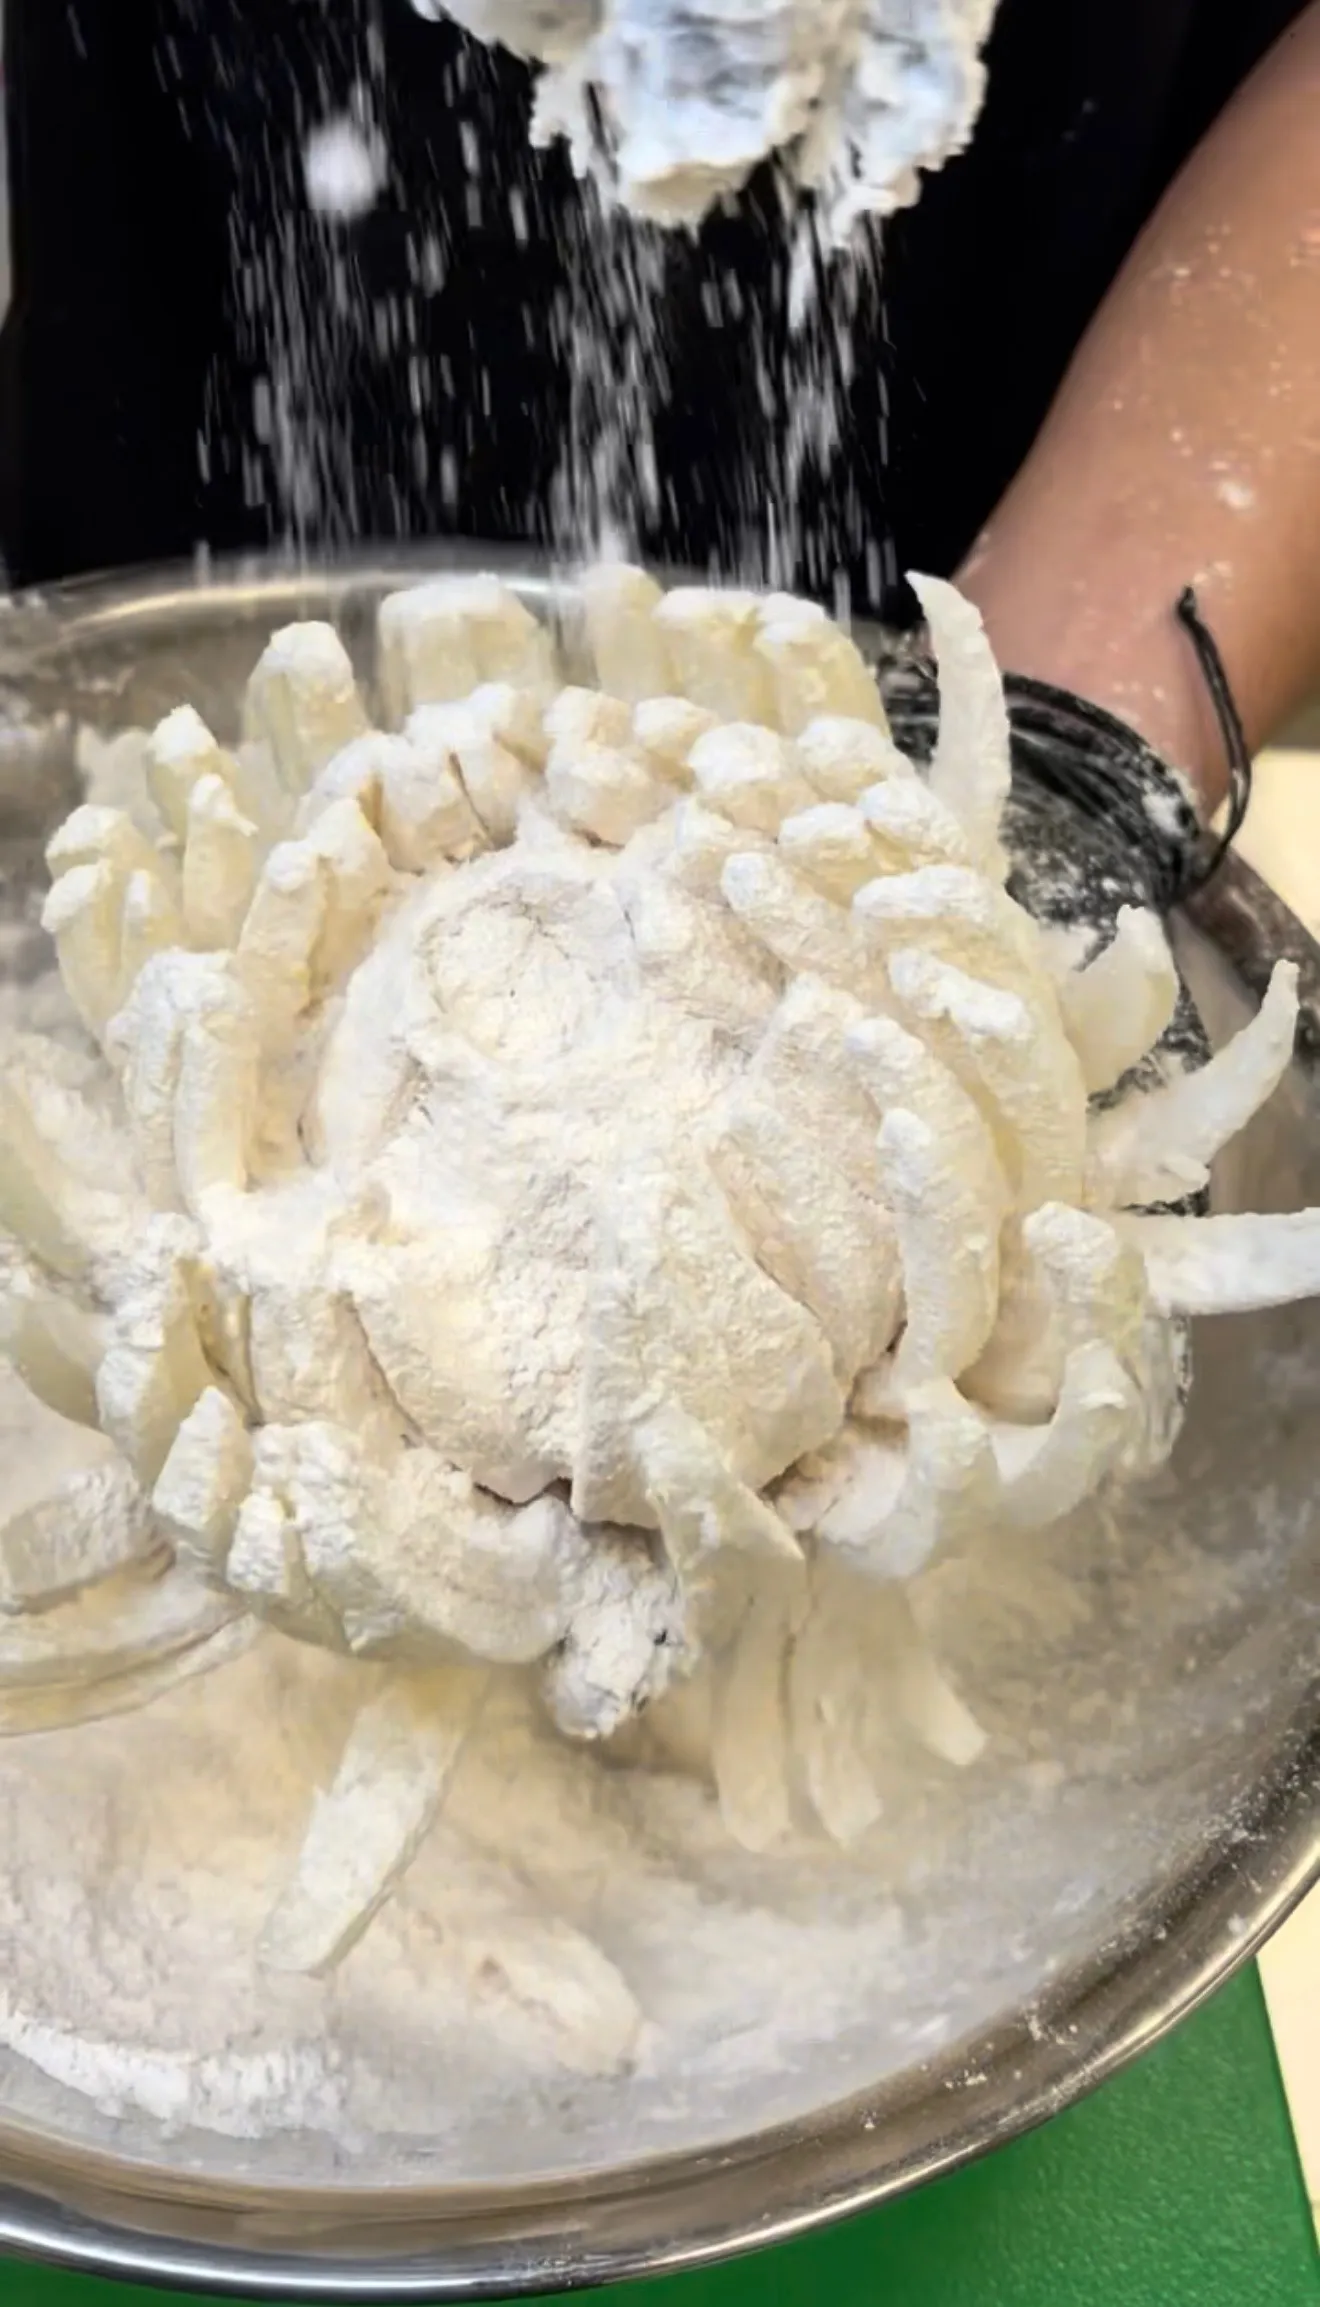
A single flour coating produces a thin, fragile shell that often cracks or falls off during frying. The double-coat method builds a thick, crunchy exterior that stays intact. The process works like this: flour first, then egg wash, then flour again. The first flour layer absorbs moisture from the onion surface and creates a dry base for the egg wash to grip. The egg wash acts as glue. The second flour layer adheres to the wet egg and becomes the crispy outer shell. Consequently, you get a coating that is nearly twice as thick and significantly crunchier than a single dredge.
Getting batter deep between the petals is the most important and most tedious part. Use your fingers to separate each petal and press the flour mixture into every crevice. The egg wash is easier to apply because you can pour it over the onion and let gravity pull it between the layers. For the second flour coat, hold the onion upside down over the flour bowl and spoon the mixture over and between every petal. Shake off the excess gently. Any loose flour that falls into the oil will burn and leave dark specks on the finished product.
The Spice Blend Matters
Paprika, garlic powder, onion powder, cayenne, salt, and black pepper go directly into the flour. This ensures every bite of the coating is seasoned, not just the surface. Paprika provides color and a mild, smoky sweetness. Garlic and onion powders reinforce the savory quality without adding moisture. Cayenne is optional but recommended. Even a half teaspoon adds a subtle warmth that keeps the sweetness of the onion from becoming one-dimensional. Specifically, the balance you want is savory and slightly spicy on the outside, sweet and tender on the inside.
Frying Temperature and Technique
375°F Is the Target
Oil temperature determines whether your blooming onion is crispy or soggy. At 375°F (190°C), the batter sets almost instantly on contact, trapping steam inside that cooks the onion from within. If the oil is too cool (below 350°F), the batter absorbs oil before it crisps, producing a greasy, heavy result. If the oil is too hot (above 400°F), the exterior burns before the interior cooks through. Use a deep-fry thermometer or candy thermometer clipped to the side of the pot. The temperature will drop 15 to 20 degrees when you add the onion, so let it recover before starting your timer.
Use a Wide Pot
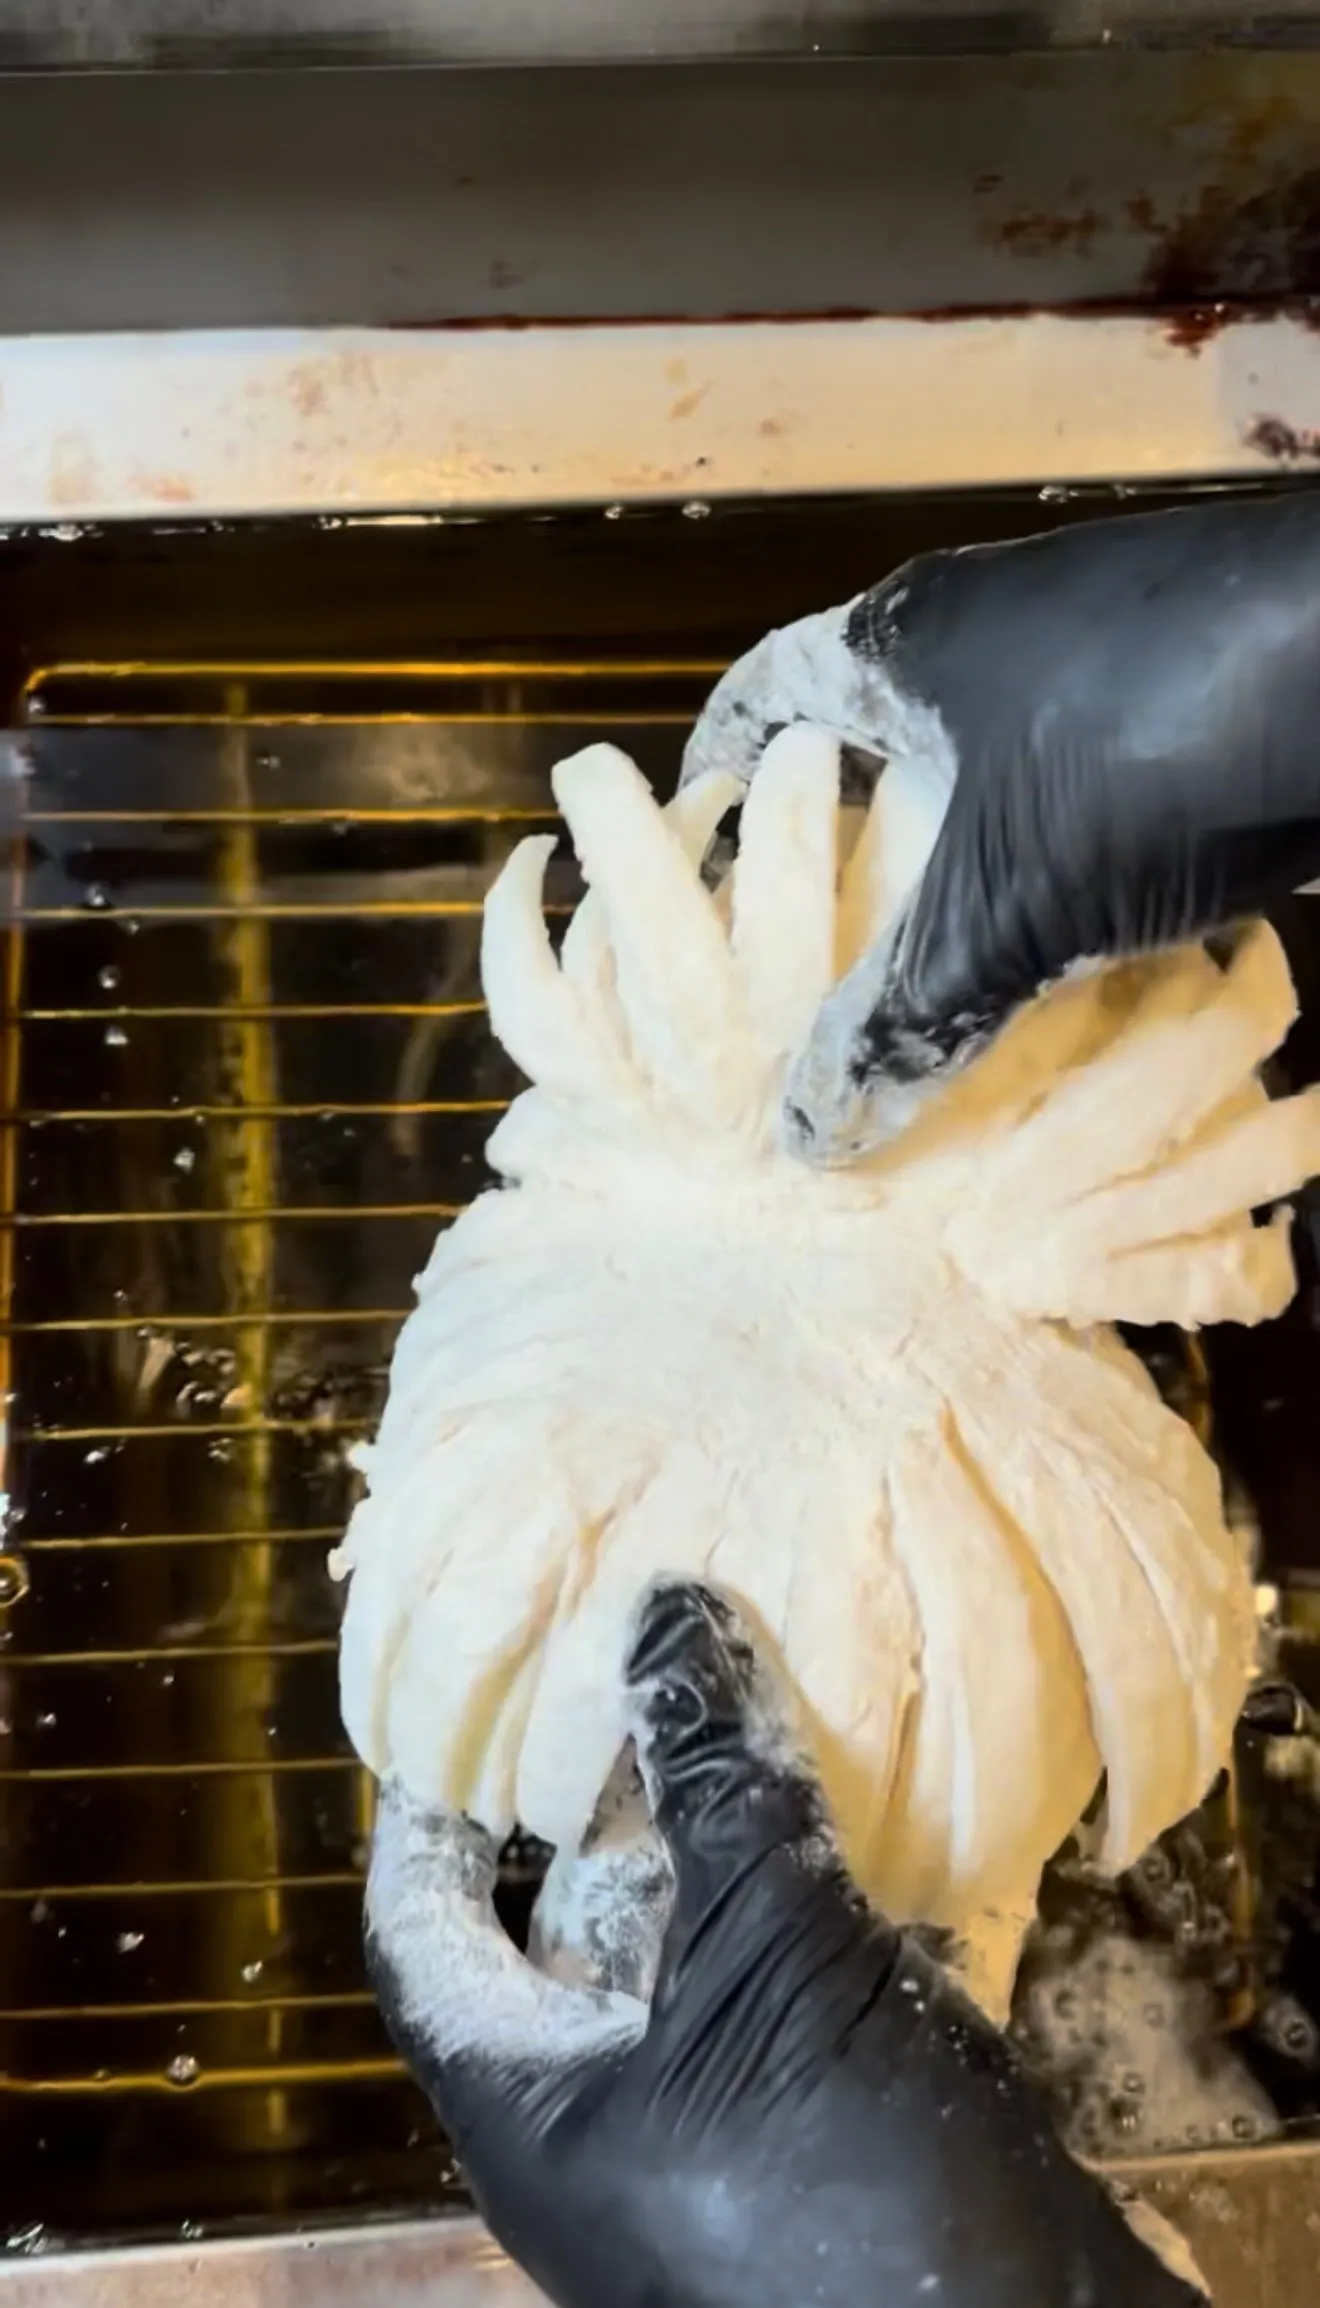
The onion needs room to bloom outward during frying. A narrow pot compresses the petals and prevents them from opening fully. Use a Dutch oven or stockpot that is at least 10 inches wide and 5 inches deep. Fill with 3 to 4 inches of oil. Lower the onion in root-side up first (petals facing down). This allows the petals to float outward as the batter firms up. After 3 to 4 minutes, carefully flip the onion using two large spoons or a spider strainer. Fry root-side down for another 3 to 4 minutes until the entire surface is golden brown.
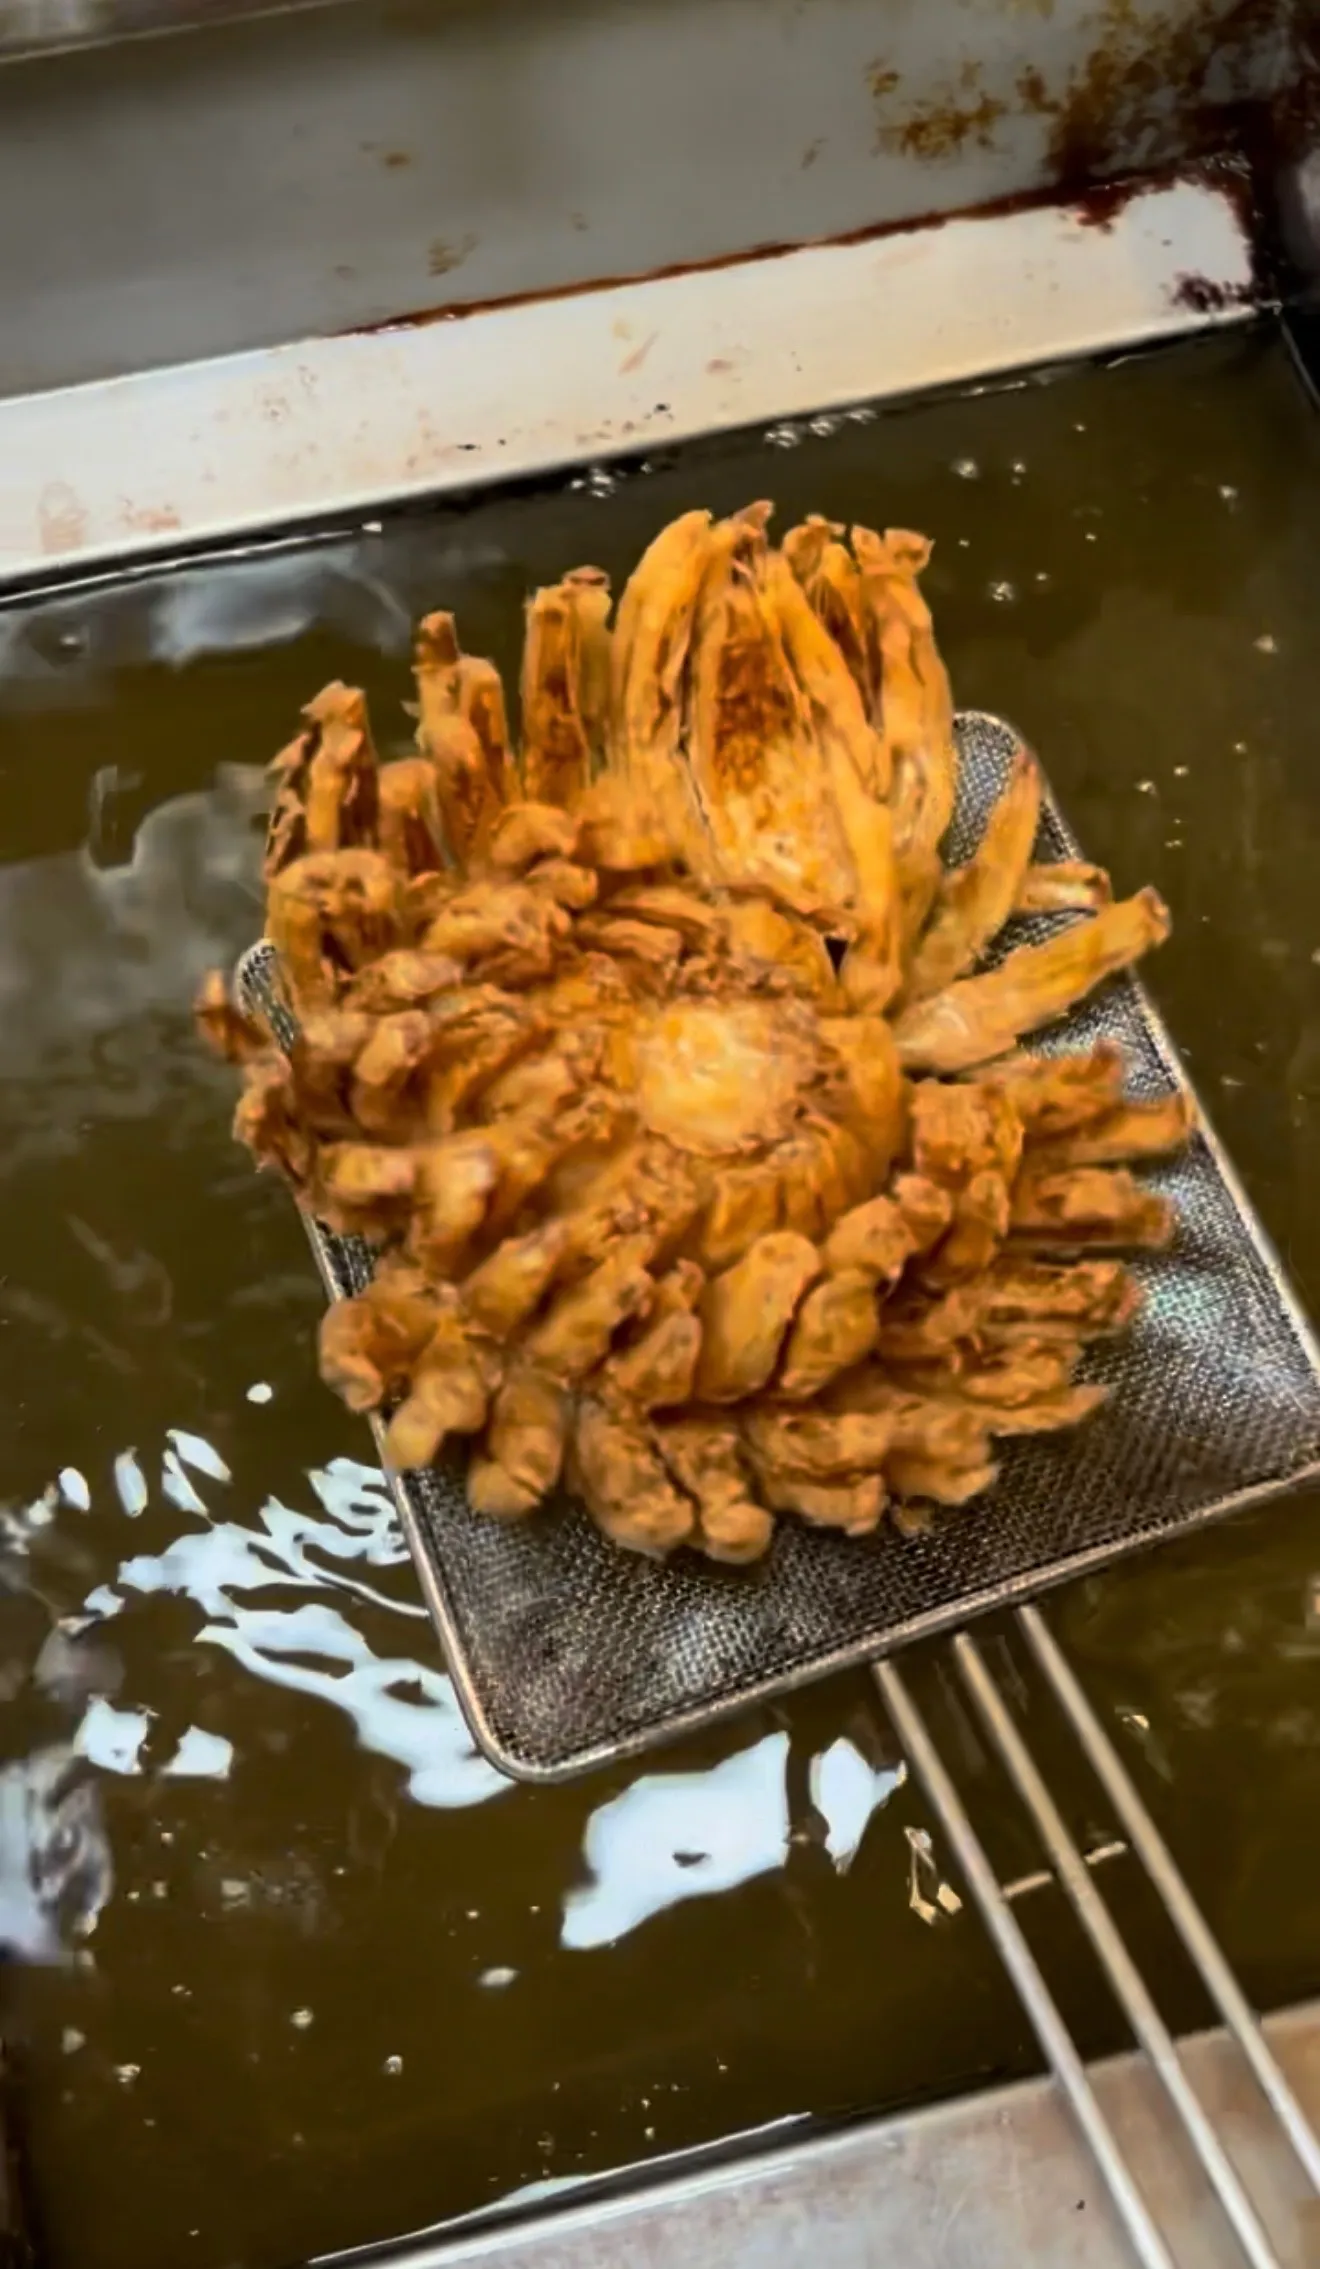
Furthermore, drain the finished onion on a wire rack set over a baking sheet, not on paper towels. A wire rack allows air to circulate underneath, keeping the bottom petals crispy. Paper towels trap steam and cause the bottom to soften within minutes.
The Dipping Sauce
Five Ingredients, No Cooking
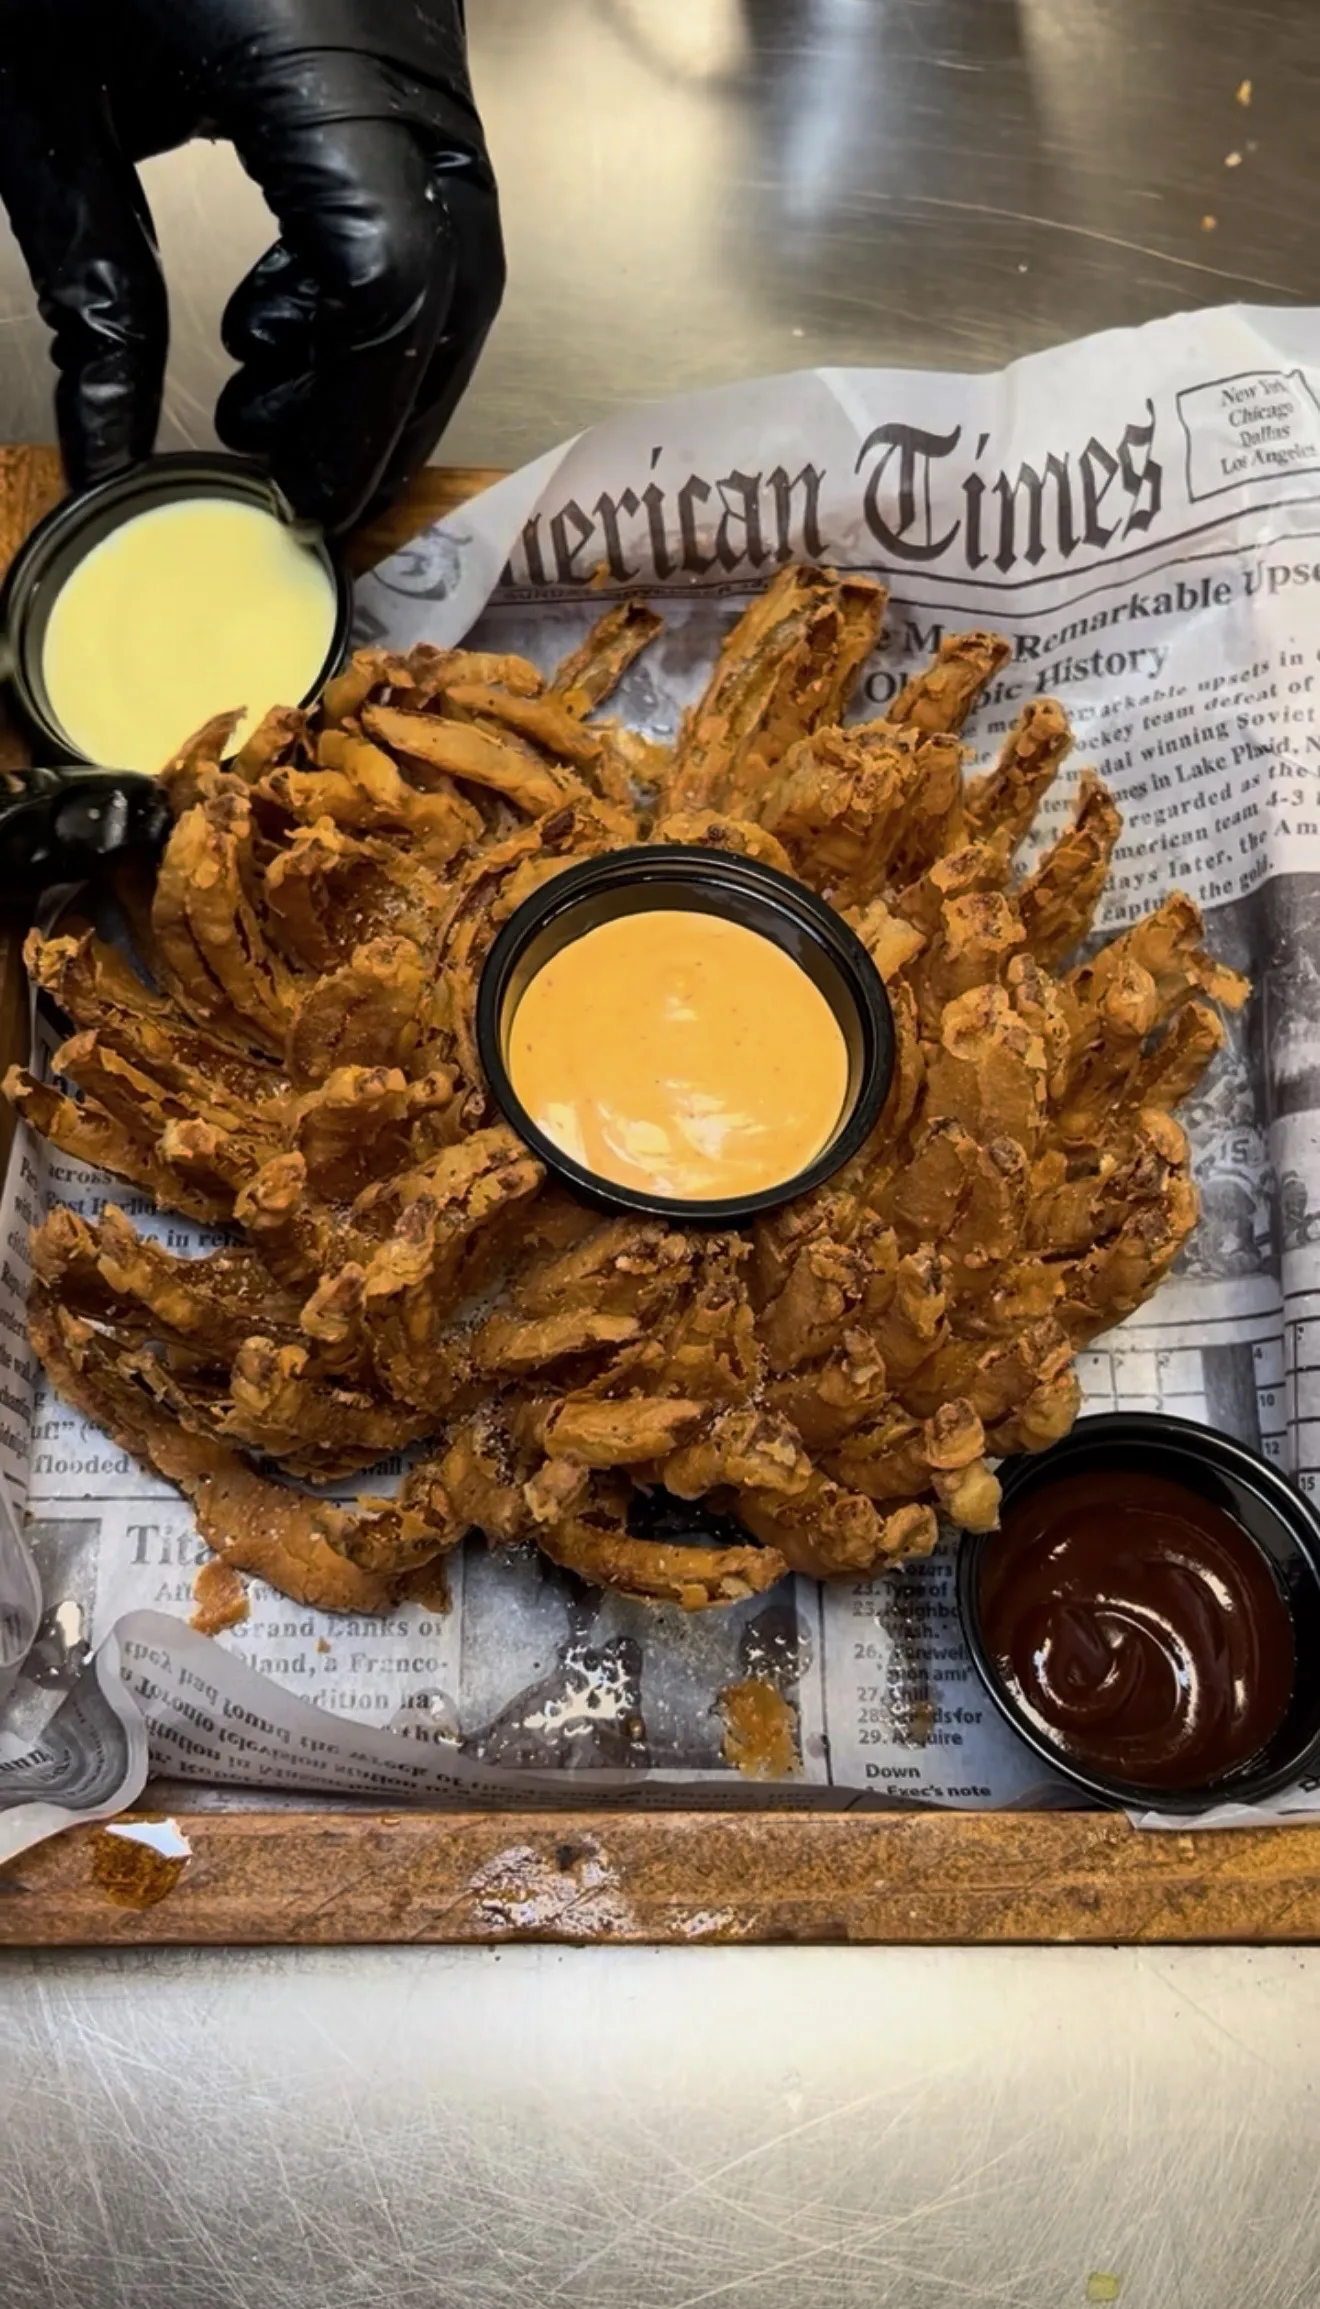
The classic blooming onion dipping sauce is a simple mix of mayo, ketchup, horseradish, paprika, and salt. It takes 30 seconds to whisk together and can be made while the onion fries. The horseradish is the key ingredient. It provides a sharp, sinus-clearing bite that cuts through the richness of the fried batter. Without it, the sauce tastes like fancy fry sauce. With it, the sauce has a distinct kick that pairs perfectly with the sweet onion inside. Additionally, make the sauce at least 10 minutes ahead if possible. Resting allows the flavors to meld and the horseradish to mellow slightly.
Blooming Onion
Ingredients
The root holds the entire onion together. Cut downward from the top, stopping about half an inch from the root base. If you cut through it, the onion falls apart into individual rings and will not bloom.
Oil temperature determines crispy vs. soggy. Too cool and the batter absorbs oil. Too hot and the outside burns before the inside cooks. Use a thermometer and let the temperature recover after adding the onion.
Flour, then egg wash, then flour again. The double coat creates a thick, crunchy shell that stays intact during frying. Get the batter deep between every petal. That is where most people skip and end up with bare spots.
Step-by-Step Instructions
Step 1: Cut the Onion
Slice off the top (pointy end) of the onion, removing about half an inch. Leave the root end completely intact. Peel the outer skin. Place the onion root-side down on a cutting board. Starting about half an inch from the root, make a downward cut through the onion to the cutting board. Rotate and repeat, making 12 to 16 evenly spaced cuts around the onion. Each cut creates a petal.
Flip the onion over and gently press down on the root to fan the petals outward. If they resist, separate them carefully with your fingers. For a wider bloom, soak the cut onion in ice water for 10 minutes, then pat completely dry before battering.
Step 2: Make the Batter
In a large bowl, mix 1 1/2 cups flour with paprika, garlic powder, onion powder, cayenne, salt, and black pepper. In a separate bowl, whisk together 2 eggs and 1 cup of milk until smooth. Set both bowls next to each other for easy dipping.
Step 3: Double-Coat the Onion
Hold the onion by the root and press it into the flour mixture, working the seasoned flour deep between every petal with your fingers. Shake off the excess. Dip the entire onion into the egg wash, letting it flow between the petals. Alternatively, pour the egg wash over the onion to ensure full coverage. Return to the flour and coat a second time, pressing the mixture into every crevice. Shake off any loose flour gently.
Step 4: Fry the Onion
Heat 3 to 4 inches of oil in a wide, deep pot or Dutch oven to 375°F (190°C). Use a thermometer to monitor the temperature. Carefully lower the onion into the oil root-side up (petals facing down). The petals should fan out and float. Fry for 3 to 4 minutes until the bottom is golden brown.
Using two large spoons or a spider strainer, carefully flip the onion. Fry for another 3 to 4 minutes until the entire surface is deep golden brown and the coating is crispy. Remove and place on a wire rack set over a baking sheet to drain. Do not use paper towels, as they trap steam and soften the bottom.
Step 5: Make the Dipping Sauce
While the onion fries, whisk together 1/2 cup mayo, 2 tablespoons ketchup, 1 tablespoon horseradish, 1/2 teaspoon paprika, and a pinch of salt. The horseradish provides a sharp kick that cuts through the richness of the fried coating. Taste and adjust the horseradish to your preference. Make it 10 minutes ahead if possible so the flavors have time to meld.
Step 6: Serve Immediately
Place the blooming onion on a plate or cutting board. Set the dipping sauce in a small bowl in the center or alongside. Serve immediately while the coating is still hot and crispy. Pull individual petals off and dip. The onion softens as it cools, so this is a serve-it-the-second-it-is-ready situation.
Blooming Onion
Ingredients
Equipment
Method
- Cut off the top of the onion (pointy end). Leave root intact. Peel. Place root-side down and make 12-16 evenly spaced downward cuts, stopping half an inch from the root. Gently fan petals open.
- Mix flour with paprika, garlic powder, onion powder, cayenne, salt, and black pepper in a large bowl. In a separate bowl, whisk eggs and milk together.
- Press onion into flour mixture, working it deep between every petal. Dip into egg wash. Coat in flour a second time, pressing into all crevices. Shake off excess.
- Heat 3-4 inches of oil to 375°F (190°C) in a wide pot. Lower onion in root-side up. Fry 3-4 minutes, flip, fry another 3-4 minutes until golden brown all over.
- Drain on a wire rack (not paper towels). Mix dipping sauce: mayo, ketchup, horseradish, paprika, and salt. Serve immediately.
Notes
Blooming Onion — FAQ
Blooming Onion Questions
The key is the root. Leave the root end completely intact and make all your cuts from the top, stopping about half an inch from the root base. The root acts as a hinge that holds every petal together. Make 12 to 16 evenly spaced downward cuts for the best bloom. If a petal separates, you cut too close to the root.
Sweet onions like Vidalia, Walla Walla, or Maui are the best choice. They have higher sugar content and lower sulfur, which means they caramelize inside the batter during frying and taste sweet and tender rather than sharp. Choose the largest onion you can find for a more dramatic bloom and more surface area for the batter.
Two likely causes: the oil was not hot enough, or you drained it on paper towels. Oil below 350°F causes the batter to absorb grease before it crisps. Always fry at 375°F and use a thermometer. After frying, drain on a wire rack set over a baking sheet so air circulates underneath. Paper towels trap steam and soften the bottom.
You can, but the result will not be as crispy as deep frying. Air fryers do not submerge the onion in oil, so the coating crisps unevenly and the petals do not bloom as dramatically. For the best air fryer result, spray the coated onion liberally with oil on all sides and cook at 375°F for 15 to 20 minutes, checking frequently. The texture will be closer to baked than fried.
Batter and Serving
The onion was likely too wet when you applied the first flour coat, or you only did a single coat. Pat the onion completely dry before starting. The double-coat method (flour, egg wash, flour again) creates a much stronger bond. Additionally, shake off excess flour gently. Loose flour falls into the oil and burns, leaving dark specks on the finished product.
The classic sauce is mayo, ketchup, horseradish, paprika, and salt. The horseradish is the essential ingredient. It provides a sharp bite that cuts through the richness of the fried batter. Without it, the sauce tastes like regular fry sauce. Whisk everything together and let it sit for 10 minutes before serving so the flavors have time to combine.
You can cut and batter the onion up to 2 hours ahead and refrigerate it on a wire rack. Fry right before serving. Do not fry ahead of time, as the coating loses all its crunch within 15 to 20 minutes. The dipping sauce can be made a day ahead and stored in the fridge. It actually tastes better after resting overnight.